


Ballistic Helmet Accessories: 10 Must-Have Add-Ons 2026

Quick answer: The ten ballistic helmet accessories that earn the mount real estate are helmet-mounted lights, NVG mounts (Wilcox L4G24 or shroud equivalent), ballistic visors at NIJ 0101.06 Level IIIA, helmet cameras, M-LOK or ARC rails, rear counterweights, helmet covers, padding and suspension upgrades, integrated face shields, and a hearing-protection headset rigged for rail compatibility.
A bare ballistic helmet protects the skull. The accessories are what make it usable for the work it has to do, whether that work is night-vision-driven movement, indoor breaching with white light, or vehicle-borne LE patrol where the kit lives on a seat-frame mount until the call drops. Build the rig around the job, not the catalog photo.
Bulletproof Zone ran a community giveaway for the PGD ARCH helmet and asked the same question every kit-builder eventually answers: what is your favorite helmet accessory and why? Night vision goggles ran away with it. Helmet covers, white lights, camera mounts, and ear protection rounded out the rest of the responses, in roughly that order. The list below is built from that signal plus what holds up on the ballistic helmets we stock when actually run hard.
- Helmet-mounted lights
- Night vision goggles (NVG) mounts
- Ballistic visors
- Helmet cameras
- Rail systems
- Counterweights
- Helmet covers
- Padding and suspension systems
- Integrated face shields
- Do's and don'ts of setting up ballistic helmet accessories
- Ear protection and comms headsets
- Mission ready: building a rig that actually runs
- Frequently asked questions
Helmet-mounted lights
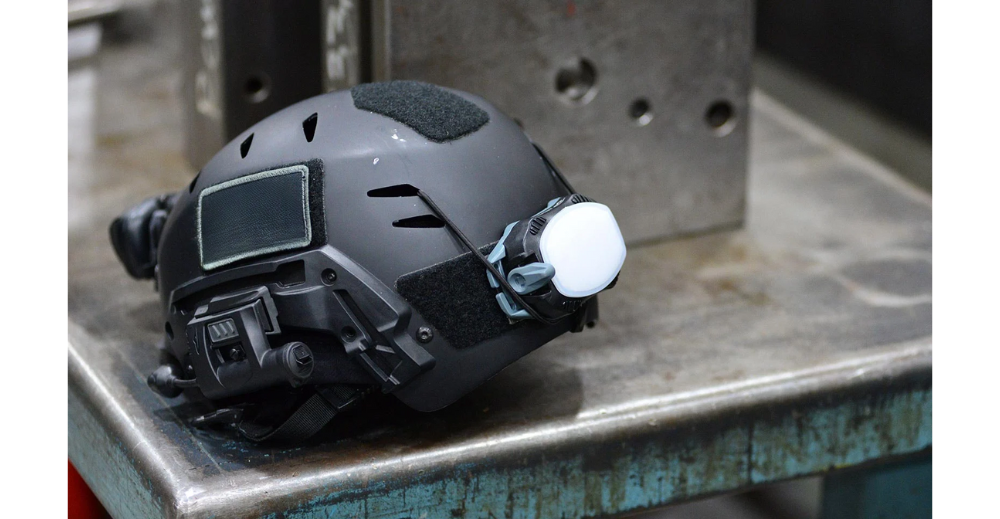
A hands-free white light on the helmet does what a handheld flashlight cannot. Both hands stay on the rifle, on a teammate, or on the casualty. The Surefire HL1-A and the Cloud Defensive MCH-LH are the rail-mounted lights that show up on serious helmets; Princeton Tec Charge MPLS for the ARC-rail crowd that wants IR + white in the same housing.
Mount placement matters more than lumens. A 300-lumen light on the left ARC rail, set at the eight-o'clock angle to the bore, lights the room without washing out the optic. A 1,200-lumen white light aimed straight forward strobes off interior walls and blinds the shooter behind it. If you can only carry one, pick the medium-output IR/white combo and run it at the lower setting indoors.
Night vision goggles (NVG) mounts
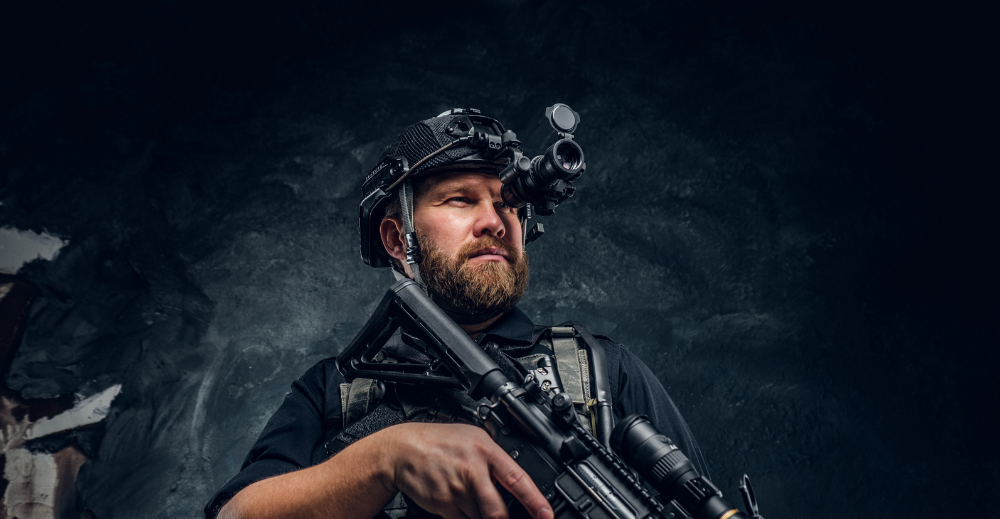
Night vision is the accessory the BPZ giveaway respondents listed first, and the mount is the half of the system that determines whether the goggles still work after a fall. The Wilcox L4G24 is the widely cloned reference standard; the Wilcox G24 Mod B and the Norotos INVG are the alternatives that show up on issued kit. The mount fastens to the front shroud of the helmet, secures the binocular at the correct eye relief, and breaks away cleanly under load instead of taking the shroud with it.
Aftermarket clone mounts in the $35 range tend to fail two ways. The lock pin wears in the first 100 don/doff cycles and the binocular sags off zero. The diopter wheels strip if forced past their stop. Either failure leaves you re-shimming in the field with a folded gum wrapper. If the helmet you stock is the PGD ARCH or any premium ballistic shell, do not pair it with a $35 mount. The shroud is the weak link, not the goggle.
Ballistic visors
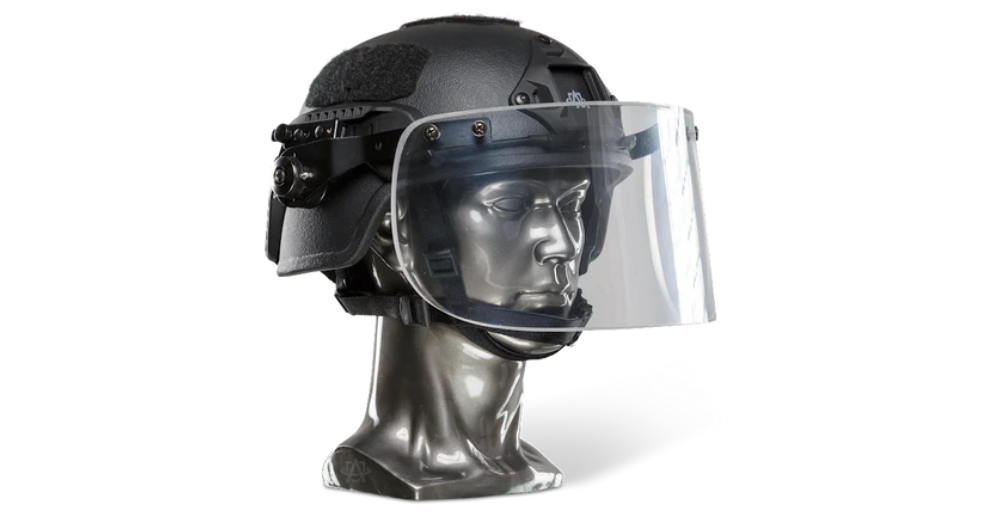
A ballistic visor is the only helmet accessory that meaningfully changes the threat profile of the rig. Most are NIJ Listed under 0101.06 Level IIIA, which means they are tested against handgun-tier rounds up to .44 Magnum at standard test velocities. They do not stop rifle rounds. Treat the visor as fragmentation and handgun-projectile coverage for the face, not as armor for contact-distance rifle threats.
The Atomic Defense Ballistic Helmet with Bulletproof Visor (NIJ IIIA+) is the visor-and-helmet pairing we stock for buyers who want the face piece and the shell as a single unit. Note: '+' ratings (e.g., IIIA+, III+) are manufacturer designations and are not part of the NIJ Standard 0101.06 or 0101.07 nomenclature. If you want to understand what the rating actually covers, our explainer on NIJ protection levels breaks down what each threat tier stops.
Helmet cameras
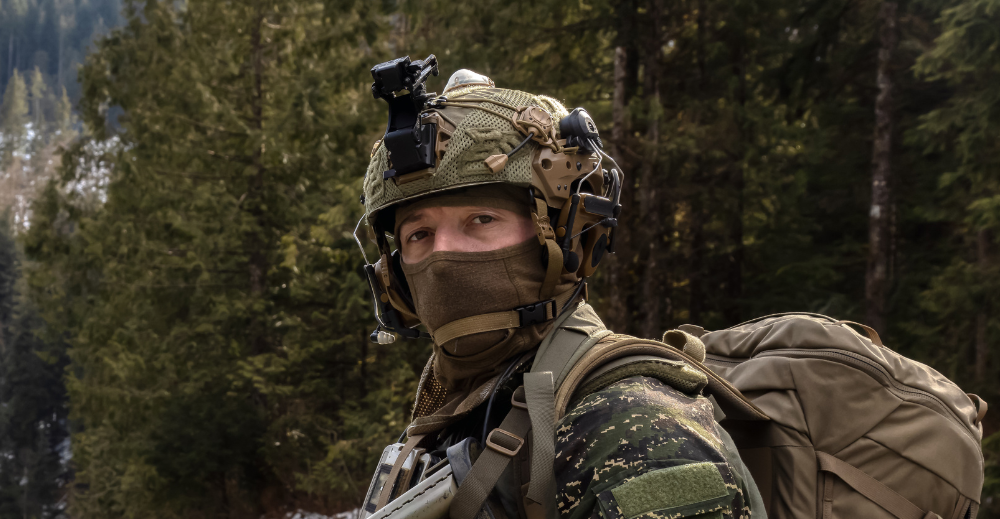
A helmet camera is the cheapest training tool in the kit. The GoPro HERO12 Black on a curved adhesive mount, or the Insta360 GO 3 if weight matters, covers the post-action review without the honest distortion that comes from "I think I cleared left first." The footage settles arguments, identifies muzzle discipline issues you cannot see from your own perspective, and gives an instructor something concrete to debrief against.
The mount is more important than the camera. Adhesive mounts come off in heat. Rail mounts do not. If the helmet has an ARC or M-LOK rail, run the camera on the rail with a NATO-clamp adapter. Mark the camera body with a strip of black gaffer tape; the bright accent lights on a stock GoPro are visible from across a parking lot at night and defeat the point of running the helmet white light at all.
Rail systems
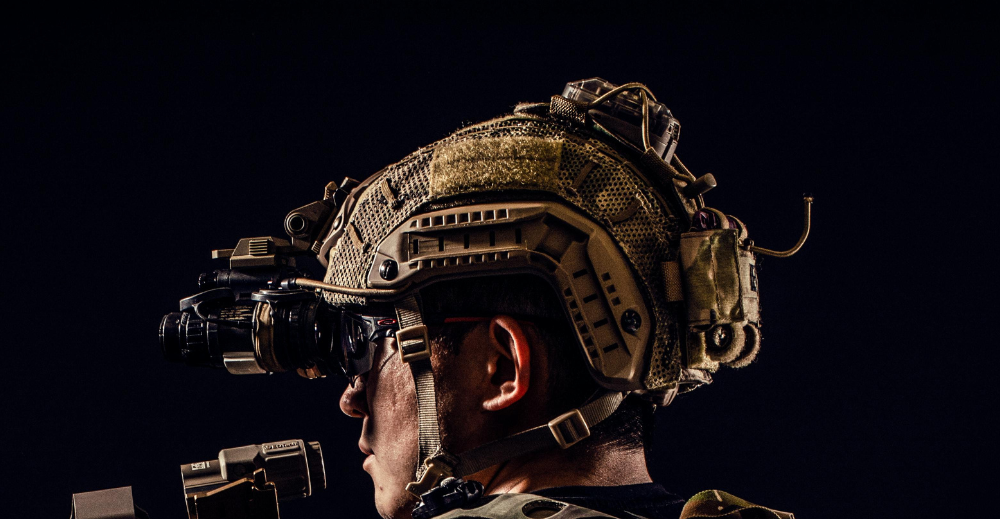
Rails are the platform every other accessory bolts to. The two standards are ARC (Accessory Rail Connector, Ops-Core / Team Wendy pattern) and M-LOK on newer designs. ARC has been the dominant standard on bump and ballistic shells for over a decade and the accessory inventory reflects that. M-LOK exists on a smaller subset of helmets and is most common on rifles, where buyers may already have spare hardware.
Compatibility is the trap. A Team Wendy ARC mount and an Ops-Core ARC mount look identical and mostly interchange, but the depth and tooth profile vary slightly between manufacturers and some aftermarket clamps will rock under recoil from a mounted IR illuminator. Buy the rail accessory from the same maker as the rail when you can, and bring the helmet to the bench before the range to confirm fit.
Counterweights
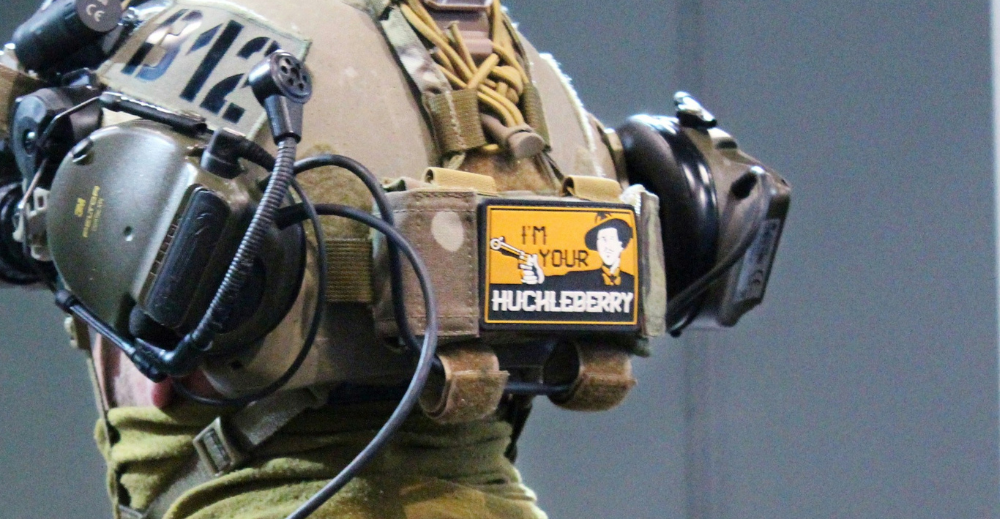
Front-mounted NVGs and lights pull the helmet forward and load the neck. A 1.5 lb counterweight on the rear ARC rail balances roughly 0.8 lb of NVG plus the white light, and the difference shows up in fatigue across a four-hour patrol or a six-hour course of fire. The Manta Strobe pouches and the Princeton Tec Counterweight pack double as battery storage so the weight is doing two jobs.
The weight has to ride high on the rear rail, not at the helmet edge. A low-mounted counterweight rotates the shell backward and tips the goggles up, which is the opposite of what was wanted. If the helmet keeps tilting after the counterweight goes on, the weight is too low or the strap system needs adjustment, not more weight.
Helmet covers
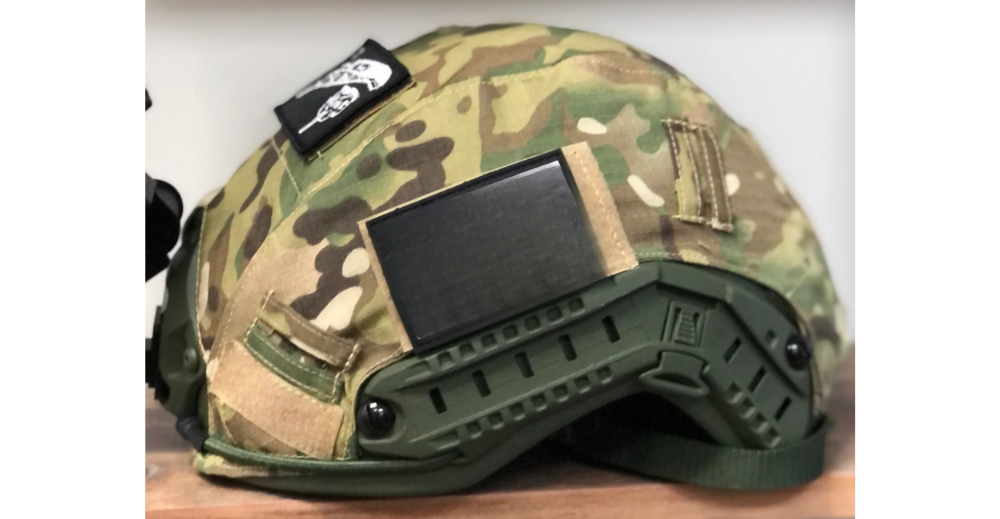
Helmet covers do two jobs: they break up the round silhouette of the shell against background, and they protect the gel coat from the daily abuse of being thrown into a bag. The Ace Link Armor Ballistic Helmet Cover uses a Velcro field on the top panel for IR or visible identification patches and works on most ARC-railed shells.
Cheap covers tear at the rail cutouts inside the first few training cycles. The seam where the cover wraps around an ARC rail is the highest-stress part of the cut and the first place a $20 cover fails. Genuine covers from Ops-Core, Team Wendy, or Ace Link reinforce that seam with bartack stitching and do not fail the same way. If the cover is going to live on the helmet, buy it from the helmet maker or a peer-tier supplier.
Padding and suspension systems
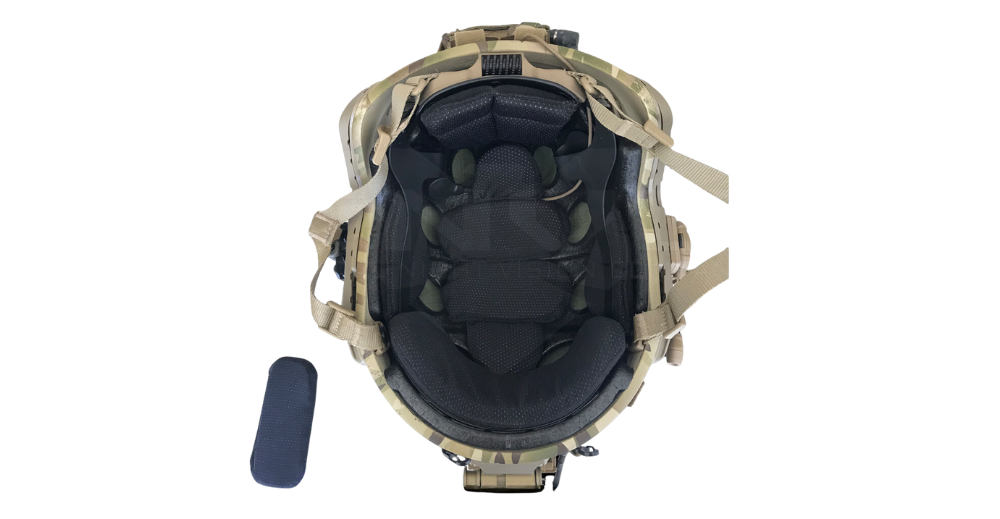
The pad set is the part of the helmet that touches the head, and replacing the factory pad set is the single biggest comfort upgrade most buyers can make. Team Wendy Zorbium pads, Oregon Aero ProForm pads, and the LiquidLogic gel kits all run on the same hook-and-loop fields. Swap the pads and the helmet that hurt at hour two will run hour eight.
The H-Nape suspension is the other half of fit. A four-point H-Nape adjusts under the occipital bone instead of the chin alone, distributes load across the back of the skull, and keeps the helmet from rotating when the wearer looks up under NVGs. For long shifts in patrol or extended training, the H-Nape pays for itself in fewer hot spots. Pair the pad set with a chinstrap that locks under tension; the bungee chinstrap is fine for static wear and useless for any movement that loads the helmet.
Integrated face shields
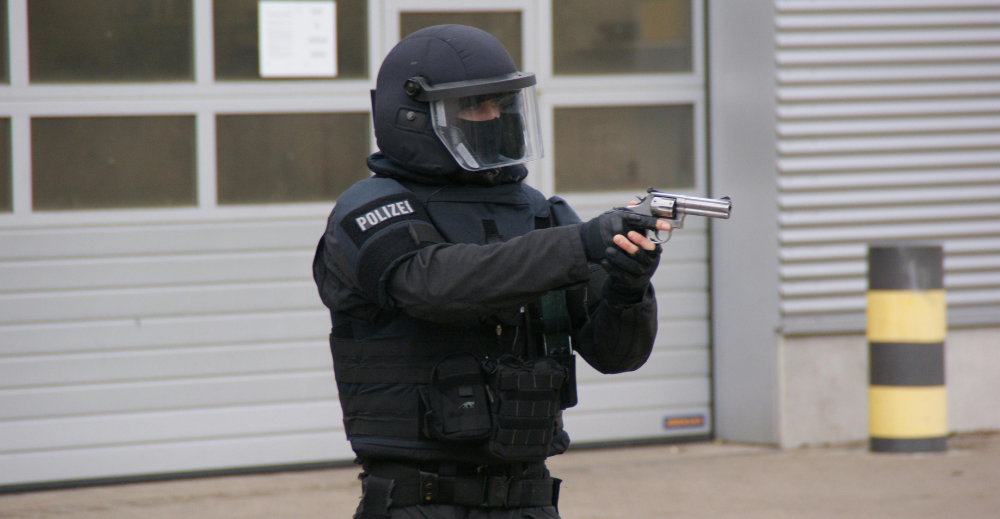
Face shields cover what a visor does not. A clear ANSI Z87.1 impact-rated shield is the minimum for force-on-force training (UTM, Sim rounds). For breach work, the shield wants the same IIIA tier as the visor and rated against fragmentation, not just impact. Distinguish between a polycarbonate impact shield and a ballistic shield; the words look similar and the prices do not.
Integrated face shields are full-face protection, not partial coverage. They mount to the helmet shroud or to the side rails and pivot up out of the line of sight when not deployed. A shield that does not pivot stays in the way and gets removed; a shield that pivots and locks is the one that actually rides on the kit long-term.
Do's and don'ts of setting up ballistic helmet accessories
The setup decisions matter as much as the parts. Here is how the experienced LE and military buyers we ship to actually run the rig.
Do:
- Balance front and rear weight before the first range trip. Front load is the source of most "this helmet hurts" complaints.
- Test every accessory mount under recoil and movement before the kit goes live. A mount that holds in the parking lot can rock loose during a 100-round drill.
- Match accessories to the helmet's rail standard (ARC vs M-LOK) and to the manufacturer when possible. Cross-brand fit varies more than the photos suggest.
- Keep a torque driver in the range bag. The screws on rail mounts and shroud bolts loosen with use; check them weekly.
Don't:
- Overload the shell. A helmet with a light, NVGs, a camera, a counterweight, a strobe, and an ear-pro headset is heavier than a Level IV plate. Pick the three accessories that match the mission and leave the rest in the kit bag.
- Pair a premium ballistic shell with budget mounts. The shroud and rails are the weak links; the cheap mount fails before the expensive helmet does.
- Trust adhesive mounts in heat. Vehicle dashboard temperatures release VHB tape; a $300 camera comes off a $1,000 helmet for the price of a 3M strip.
Ear protection and comms headsets
The tenth accessory most buyers overlook is hearing protection rigged to the rail. The 3M Peltor ComTac III and the Wendy Cap Comtac III ARC kit clip into the ARC rail and run electronic attenuation that lets the wearer hear range commands while shutting off muzzle blast. Over-the-ear muffs interfere with chinstraps and shroud-mounted NVGs; rail-mounted earpro solves the geometry problem at the source.
For LE and patrol rigs that already use a radio, the in-ear options (3M Peltor TEP-100, Surefire EP4) free the rail entirely and integrate cleanly with a chest-rig PTT. Our chest rig buyer's guide covers the PTT placement that pairs with rail-mounted comms.
Mission ready: building a rig that actually runs
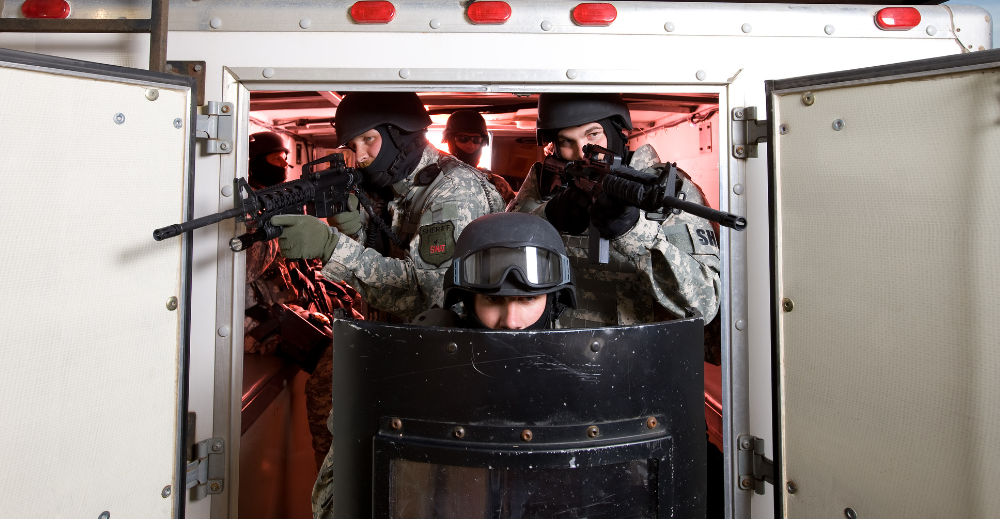
A complete ballistic helmet rig built around three accessories (NVGs, white light, counterweight) outperforms a helmet packed with seven half-mounted parts. Add the visor or face shield only if the threat picture justifies the weight. Add the camera if the training value is real. The rest of the catalog is optional.
Bulletproof Zone is a multi-brand retailer; what we ship reflects the manufacturers we trust on this product class. The accessory short list above is the same set we run on our own demo helmets for trade events and product photography. If a mount or cover works after twelve months of being thrown into a Pelican case, it stays on the recommended list. If it fails, it does not.
Frequently Asked Questions
What are the most important ballistic helmet accessories?
For most civilian and LE buyers the priority order is: NVG mount, rail-mounted white light, rear counterweight, helmet cover, and replacement pad set. A ballistic visor or face shield comes next if the threat picture includes fragmentation or handgun rounds. Camera, comms headset, and accessory rails round out the remaining mount real estate.
What rail standard do ballistic helmets use?
The ARC (Accessory Rail Connector) standard, originated by Ops-Core and adopted broadly across Team Wendy and most premium ballistic shells, is the dominant standard. M-LOK is appearing on newer helmet designs but the accessory selection is smaller. ARC accessories from different manufacturers mostly interchange, with fit-and-finish variation worth checking on the bench.
Are ballistic visors NIJ rated?
Most ballistic visors are NIJ Listed under 0101.06 Level IIIA, tested against handgun-tier rounds. They do not stop rifle rounds. Some manufacturers label visors "IIIA+"; '+' ratings are manufacturer designations and are not part of the NIJ Standard 0101.06 or 0101.07 nomenclature.
How much weight can you put on a ballistic helmet?
A typical Level IIIA ballistic helmet weighs 2.8 to 3.5 lb empty. Once you add NVGs (0.8 to 1.0 lb), white light (0.3 lb), camera (0.2 lb), counterweight (1.5 lb), and a rail-mounted headset (0.6 lb), the rig clears 6 lb. Beyond that, neck fatigue starts to show up inside the first hour. Three accessories plus pads is the sweet spot for most buyers.
Do helmet accessories from different brands fit together?
Same-standard accessories (ARC to ARC, M-LOK to M-LOK) usually fit but tooth depth and clamp pressure vary between makers. Match the rail accessory to the rail manufacturer when possible. For NVG mounts, stick with the helmet maker's recommended shroud and mount pairing; cross-brand combinations are where slop and zero-loss happen.
What is the best counterweight setup for NVGs?
A 1.0 to 1.5 lb counterweight on the rear ARC rail balances 0.8 to 1.0 lb of NVG plus a small light. Mount the weight high on the rear rail rather than at the helmet edge so the helmet stays level instead of tipping back. Battery pouches that double as counterweights (Manta Strobe, Princeton Tec) earn their spot.
Can you mount a regular flashlight on a ballistic helmet?
A handheld flashlight on an adhesive bracket is not a real mount; in heat or under recoil it will come off. Use a purpose built rail-mount white light (Surefire HL1-A, Cloud Defensive MCH-LH, Princeton Tec Charge MPLS) that locks into ARC or M-LOK. The rail mount also lets you angle the beam off-axis to avoid washing out the optic.
Key takeaways:
- Build the helmet around three accessories first: NVG mount, white light, rear counterweight. Add visor, camera, and comms headset only when the mission justifies the weight.
- Match rail accessories to rail brand. ARC is the dominant standard but cross-brand clamp pressure varies and matters under recoil.
- Ballistic visors and face shields are NIJ Listed under 0101.06 Level IIIA against handgun rounds. They are not rifle-rated. '+' ratings are manufacturer-only designations.
- Replacing the factory pad set and adding an H-Nape suspension is the single biggest comfort upgrade for long-shift wear.
- Premium shell, premium mounts. A $35 NVG clone mount on a $1,200 ballistic helmet is the wrong place to economize.
Disclaimer: This article is for informational purposes only and does not, and is not intended to, constitute legal advice. Body armor laws change frequently at both federal and state levels. Consult a licensed attorney in your jurisdiction before relying on any information presented here. Bulletproof Zone makes no claim that body armor or ballistic helmets will provide complete protection in any scenario; no body armor is bulletproof. Last verified against published statutes and the NIJ Compliant Products List on April 2026.
Product specifications referenced in this article are based on each manufacturer's stated specifications at time of publication. Bulletproof Zone is a multi-brand retailer; product availability and configurations may change. Verify current product details on the relevant product page before purchase. Models referenced as "tested to NIJ standards" have not necessarily completed the NIJ Compliance Testing Program; verify CPL status at https://nij.ojp.gov/topics/equipment-and-technology/body-armor/ballistic-resistant-armor before purchase.